AVR-IoT WG Notes
Get your things on the Internet in 30 Seconds Flat with the AVR-IoT board!
In case anybody else has similar issues getting the AVR-IoT WG demo application running in "30 Seconds Flat," here are my notes on two problems I had following the Getting Started instructions in the User Guide.
Connecting to the Wi-Fi Network
The recommended procedure is as follows.
-
Connect the AVR-IoT WG to your computer with a mini-USB cable
-
Open the CURIOSITY drive and select
CLICK-ME.HTM— this redirects you to the AVR-IoT web demo application, which has a URL likehttps://avr-iot.com/device/0123215BE1D6C474FE -
Use the provided form to create and save
WIFI.CFGto your computer with your network information -
Drag
WIFI.CFGto the CURIOSITY drive
When everything is working, the red LED on the AVR-IoT WG should turn off and be replaced by a pleasant blue LED and a flashing yellow LED (indicating that the light and temperature sensor data is being published).
Problem 1: Dragging WIFI.CFG doesn’t work
In my experience, simply dragging WIFI.CFG over to the CURIOSITY
drive didn’t work. I have read that repeating the drag-and-drop
process can eventually work, but there is another way to update the
Wi-Fi configuration using the serial command line interface that I
feel is more robust.
For this you will need to use a serial terminal application (like
pySerial’s Miniterm) to send the wifi command.
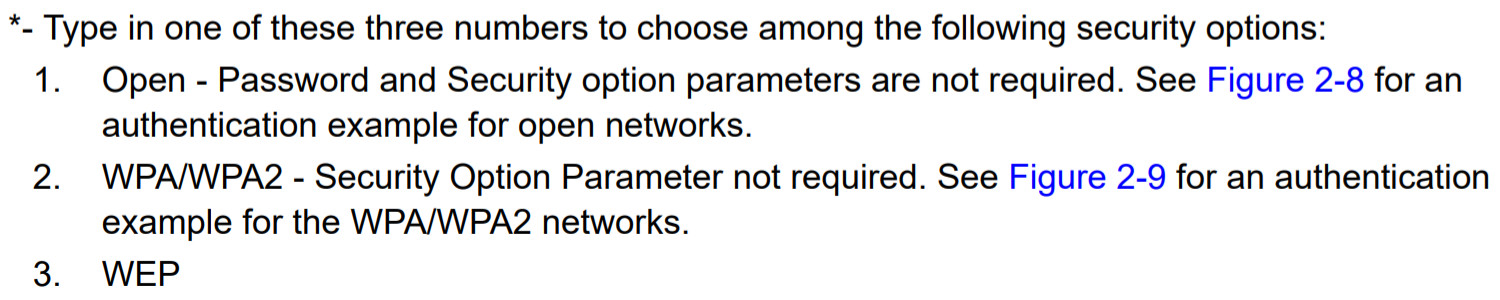
wifi SSID,PASSWORD,2 (1)| 1 | Replace SSID and PASSWORD with the name and password of your
Wi-Fi network. The last number is the security option for your
network: one of the three options (1–3) outlined in the documentation. |
Here is how it looks using miniterm.py. (The -e flag echoes the
input.)
$ miniterm.py -e /dev/ttyACM0
--- Miniterm on /dev/ttyACM0  9600,8,N,1 ---
--- Quit: Ctrl+] | Menu: Ctrl+T | Help: Ctrl+T followed by Ctrl+H ---
help
--------------------------------------------
Unknown command. List of available commands:
reset
device
key
reconnect
version
cli_version
wifi <ssid>[,<pass>,[authType]]
debug
--------------------------------------------
wifi SSID,PASSWORD,2Problem 2: CLICK-ME.HTM redirect link doesn’t include the device ID
When I opened CLICK-ME.HTM, I was redirected to
https://avr-iot.com/device/--------------------------------------------Instead of dashes, the URL is suppose to contain the unique device ID
for the board. This ID can be found using the device command in the
serial command line interface.
$ miniterm.py -e /dev/ttyACM0
--- Miniterm on /dev/ttyACM0  9600,8,N,1 ---
--- Quit: Ctrl+] | Menu: Ctrl+T | Help: Ctrl+T followed by Ctrl+H ---
device
0123215BE1D6C474FE (1)| 1 | Device ID |
With this device ID, navigating to
https://avr-iot.com/device/0123215BE1D6C474FEwill successfully open the demo application.